How To Use Facebook Live: Get An Easy Beginner’s Guidance
If you’re wondering how to use Facebook Live, then you’ve come to the right article as we’ve covered all of that in here. Now, Facebook doesn’t need any kind of introduction, especially in the year 2019. There are 2.38 billion registered users on Facebook as of the time you’re reading this article. And, this huge userbase spans throughout the world, in countries big and small.
This social media behemoth is also not standing all by itself. Under its wing, Facebook has two other ubiquitous social media platforms. Instagram and Whatsapp, valued at billions of dollars like itself.
This is as impressive a resume as it can get for an internet company. But such massive popularity and outreach have legitimate reasons behind them. And, that has to do with all the features you can get.
Here, I am going to be discussing how to use Facebook Live. So, read along.
Facebook Live: Overview
From the long list of features which you can get just from Facebook itself, some have truly become household names. One of them is Facebook Live, which the company introduced first in August of 2015.
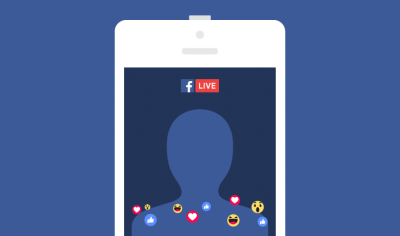
Then, within the next 8 months, everybody got to use this feature from their handheld devices and computers alike. As the name suggests, you’ll be able to carry out live broadcast sessions from your Facebook account.
Thus, you’ll be able to communicate back and forth with your connections on Facebook in real-time. There is a specific chat section near the bottom of the broadcast screen. That is where people who have joined your Facebook Live session can type in their comments.
This was a fun new thing for all the users of Facebook at that time. And to this day, Facebook Live is as popular as ever.
Just notify the time when you want to go live from beforehand. And as soon as you go live, the interested people from among your connections will start coming live. Also, you can take over from there with whatever it is that you’re trying to talk about.
This has also been a go-to for a lot of marketers to promote their businesses or brands. As this helps cover one of the most fundamental tenets of marketing. And that is to connect with your target audience in the best possible way.
Well, that’s just the gist of it. There’s an entire process that goes into carrying out a Facebook live session successfully. Want to know more about that along with how to use Facebook Live? Read on.
How to Use Facebook Live – Easy Instruction
Doesn’t matter if you’re an entrepreneur or just a regular user. This can be a very useful social media feature for you. Here, I’ve laid down all the steps to show you how to use Facebook Live.
And, as far as the device goes, I’ve chosen mobile devices. As the vast majority of people carry out these live sessions from either iOS or Android devices.
Tap on the Camera Icon
You’re going to find a small camera icon to the lefthand side of the Facebook Search panel. This is for Facebook to start using the camera on your smartphone. Of course, you’ll have to make sure that Facebook has the necessary permissions.
Without that, it won’t be able to use the camera for the Facebook Live session. You’ll also be able to start this from the What’s on your mind section. Select the Go Live from the options available there.
So, after this, if you get a prompt for permission to use the camera, confirm it.
Choose the Live Option from the Camera Selection
Now, after the Facebook app has got access to your camera, you’ll see it through Facebook’s camera interface. Under the shoot button near the bottom of the screen, slide around to find the Live option.
Once you slide to it, you’ll be in the Live mode. All you have to after that is to tap on the shoot button. Keep in mind that the Facebook Live session isn’t going to start as soon as you tap that button.
Set the Posting and Privacy Setting for the Session
You have the option to choose who can view and participate in your Facebook Live session. For that, you’ll have to tweak the privacy setting for the session. By default, the setting is Only me, which means no one other than you can view it.
But since that’s not optimal, you’ll have to change it so that everyone can view it from your feed. Making the live session Public is going to be ideal if you’re using this for marketing and branding. You’ll have all the different options, including that for sharing with selected networks.
So, choose carefully as to who will be able to see your Facebook Live session.
Put in a Catchy Description
A compelling copy for your Facebook Live video is going to help get more views. So, you’ll have to write one of those to get more views for the session. This is quite an important aspect of learning how to use Facebook Live.
Tag in Some Connections or Specify Location
Laying out as much detail as you can is also going to make it more convenient for your viewers. It’s going to make the entire presentation a lot more personal.
And, another great thing is that you can choose the activity tag, depending on what you’re broadcasting. That will make it more likely for anyone who stumbles across the video to click on it.
Pick the Right Camera Position
If the viewers can’t see you properly, then that’s going to defeat the purpose of the whole thing. And the one thing you can do to ensure proper visibility is setting the phone camera right. You’ll have to do it in conjunction with the ambient lighting.
Make sure to face the camera away from the light instead of towards it. That is going to make sure light reflects off of you and you’re clearly visible.
Start the Session
Now that you’ve taken all the necessary preparations, it’s time to start the thing now. For that, click on the Start Live Video button on the screen. Then, with a count of 3, your Facebook Live stream is going to start.
Make sure to proactively interact with the viewers for proper engagement from their part. That is going to be critical for marketing purposes. But if you’re just chatting with your friends, then there’s no strict rule for that.
Finally, when you’re done with the session, click on the Finish button to bring the live session to an end.
How to Use Facebook Live: Wrapping up
So, you now know how to use Facebook Live. But there is one final thing that I’d like to tell you and that’s for the posting option.
In case you want to save the video on your timeline, then you can do that by clicking on the Post button. Otherwise, if you just want to keep a copy of the video on your hardware. You’ve got the Download button, which you can click to download that.


0 Comments